How do i pass in Google keywords or other ad keywords into Lucky Orange?

Google and other search engines are phasing out keyword data

Google has been gradually phasing out sending keyword data to websites. Previously the keywords people searched for were passed to your website in the web browser's referrer. Google started phasing out passing that data if someone was logged in to Google and using their secure search and clicked on an Organic link. If the user came from a PPC (Pay Per Click) link then Google still sends the keyword data.

It's affecting all 3rd party analytics services

Originally, this was affecting a small percent of users. More recently, this percentage has grown and now, is even affecting Google PPC Keyword data. This is affecting ALL analytics tools and not just Lucky Orange.

What to do about this?

Unfortunately, there is nothing we can do about this with regards to Organic Search keywords. We'll only be able to tell you that a visitor came from Google, but not the keywords they used. Again, this affects all 3rd party analytics services regarding Google traffic.

PPC Traffic Solution - Use utm_term

Lucky Orange will automatically track common utm paramaters in your landing urls, such as utm_term, utm_campaign, utm_medium, utm_source. You can send the bidding keyword through to our system by adding a utm_term={keyword} to your PPC links as follows:

  1. Open Google Ads, Facebooks Ads, Instagram Ads, etc.
  2. In the Destination URLs for your ads, add the following parameter: utm_term={keyword}

How do I install Kolahawk?

For Lucky Orange to do its magic, it needs to be aware of which pages on your site you wish to track. The way you tell Lucky Orange which pages are trackable is by placing a snippet of JavaScript — or "tracking code" — on each page you want it to know about.

Our plugins will automatically add the code to each page of your site for you. 

Tagging with Javascript

In addition to our automatic behavior tagging found in the recordings tab, you can also trigger a recording from the client side with the following javascript method:

_loq.push(["tag", customTag, star, overwrite] );

  • customTag is any string you want to tag the current user's recording with.
  • star is either true or false (to star it or not - DEFAULT is FALSE) 
  • (currently unavailable) overwrite is either true or false. (if true it will overwrite any existing tags, if false it will append this tag to any existing tags) Default is FALSE so it will append your new tag.

How do I capture keystrokes in non-sensitive fields?

As part of our Terms of Service, you must explain in your privacy policy how you use our tracking software with your visitors.

If you have a Master Account, you can control how much or how little information you wish to record. By going to Settings » Privacy, you can select whether or not to record:

  • keystrokes
  • mouse clicks
  • mouse movements
  • scrolls

How to Capture Keystrokes

You must do two things to enable the capturing of keystroke data on your site:

  1. Explicitly opt out of keystroke blocking by going to Settings » Privacy and unchecking the box labeled Do not record keystrokes. Note, however, that Lucky Orange will still block certain things like passwords, credit card information, etc. Read more about limitations.
  2. Add a class of LoNotSensitive to each field you want to capture.

Keystroke Logging Limitations

Password field data is never recorded or transmitted. No matter what. Even if you add the LoNotSensitive class name to a password field. Lucky Orange has no need for others' passwords, and neither should you.

Note: Lucky Orange also scans for certain input fields with names that denote their contents as potentially containing sensitive information, such as ccncard-numbercvv2, etc. As with password fields, these fields are internally marked as sensitive, and cannot be overridden.

Where can I find my Tracking Code?

To get your Tracking Code, just follow these steps:

1

Click the Settings gear.

2

Locate and click Tracking Code in the sidebar:

3

You'll now see your Tracking Code in the main Settings area under Your Site Tracking Code:

How to activate the Away Form

By default, when you're unavailable to chat, your visitors won't know. If you'd like visitors to be able to leave messages while you're away, you can enable the Away Form.

To active the Away Form, follow the steps below.

1

Click the Settings gear.

2

In Settings, locate and select the Away Form item in the sidebar.

3

In the main Settings area, check the Enable Away Form box, and click Save Changes.

Customize It!

The Away Form is completely customizable. Here's a quick rundown of each tab:

  1. Button Text

    Here you can the change the verbiage displayed on the Away button itself:

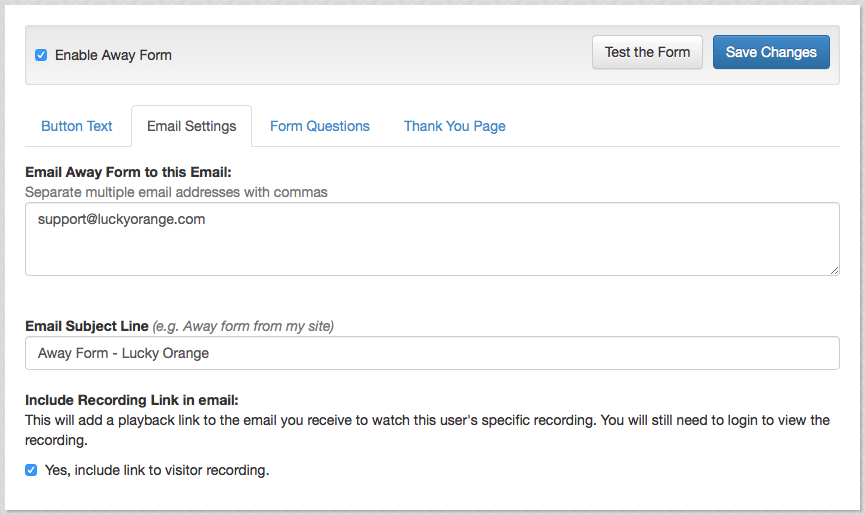
Email Settings

  • Email Away Form to This Email — Enter the email address (or multiple email addresses, separated by commas) to receive any submissions when away from Chat.
  • Email Subject Line — Enter the text you want displayed in the subject line of submission emails.
  • Include Recording Link in Email — Check the box if you want a direct link to the Recording of the visitor who filled out the Away Form included in a submission email. As it's stated in Settings, you may need to log in to view any Recordings.
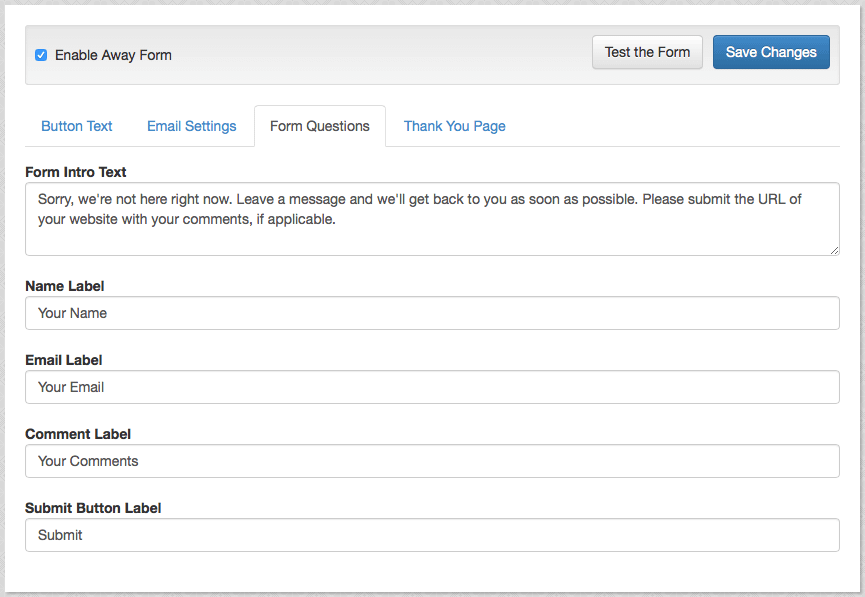
  • Form Questions

      1. Form Intro Text — Enter a few words to explain what the form is about.
      2. Name Label — Customize the text to be displayed above the "Name" field.
      3. Email Label — Customize the text to be displayed above the "Email" field.
      4. Comment Label — Customize the text to be displayed above the "Comments" field.
      5. Submit Button Label — Customize the submit button's label text.

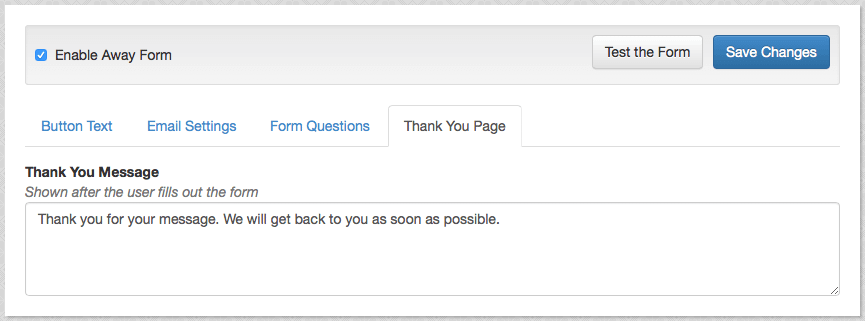
    Thank You Page

  • Thank You Message — Customize what is displayed to the visitor after he or she fills out the form.
  • Why are some visitors not being recorded?

    Some other analytics tools (e.g. Google Analytics) might show a different number of live visitors compared to Lucky Orange. If a visitor isn't being shown in the Live Visitors tab or in Recordings, it may be due to one of the following reasons:

    1. The Lucky Orange script can take up to 8 seconds to load. If the visitor bounces quickly, some analytics may pick up on this visitor, but LO will not as our code never had a chance to load. This will also prevent you from using a pageview on a visitor that did not provide any actions on site.
    2. The visitor has blocked themselves by visiting our privacy policy and disabling Lucky Orange tracking.
    3. You have not placed the Lucky Orange tracking code on ALL pages of your site.
    4. An administrator has blocked the visitor's IP (Settings » Blocked IP Addresses).
    5. The browser they are using does not allow for javascript to run.
    6. The visitor is actually a bot, such as a web search engine. Bots are ignored.
    7. They had some sort of add-on installed that blocked Lucky Orange from tracking them.
    8. The browser was too old to work with Lucky Orange.
    9. The visitor is on a page of your site that doesn't have the Lucky Orange tracking code installed.

    Block IP addresses from being tracked on my site? (Including My Own)

    You can block your own IP address, or any other IP address. Just go to Settings » Blocked IP Addresses. Then click Add IP Address.

    By default, your current IP is not blocked. However when you go into block an IP address your specific IP address will auto-populate for you.

    You can block a string of similar IP addresses by using Regex. (using an asterisk for any uncommon numbers)


    Ex: 123.456.78.90, 123.456.87.00, 123.456.34.77, 123.456.33.02
    To Block with Regex: 123.456.**.** 

    How do I activate Chat?

    To activate Chat, simply click the Chat Availability button on the right side of the main navigation bar. This button allows you to toggle between "available" and "unavailable." Master Accounts and Operators are both unavailable by default. To better visualize what a Chat Operator and visitor sees at any one time, see the Chat Status Cheat Sheet.

    When you're unavailable, the button will be gray.

    Gray indicates that chatting is inactive. This means your site's visitors will not see a chat box on the front end. 

    When you're available, the button will be green.

    Green indicates that chatting is active. This means the chat box is visible on the front end of your site. When the chat box is visible, your visitors can request a chat with you. This is a great way to engage your visitors and help them through the conversion process.


    What is Auto Invite in Chat?

    To create new or edit existing Auto Invite rules, simply do the following:

    1

    Under the Chat tab, click the Auto Invites button:

    2

    If you've never used Auto Invites before, you'll see a window much like this:

    3

    Click the Create New Invite button to bring up the Auto Invite rule editor:

    The rule editor allows you specify the conditions that must be met to automatically send a Chat invitation. You can make rules as simple or as complex as you want.

    By default, every added condition must be met, or no invitation will be sent. You can change this behavior by selecting the Match ANY option from the Condition Match Type dropdown menu:

    There are several different conditions you can choose from to get started:

    • Current URL
    • Time Spent on Current Page
    • Time Spend on Site
    • Tags

    For example, to automatically invite a user to chat if they've spent more than 2 minutes on your Signup page, you could do the following:

    By clicking Create Invite, the rule will be enabled. Once "live," every visitor who spends longer than 2 minutes (120 seconds) on any page with the word "signup" in its URL will automatically be sent an invitation to chat with you.

    If later on you decide you're having to deal with too many Auto Invites, you can edit, delete, or "pause" the rule at any time by going to your Auto Invites list ( Chat » Auto Invites; see steps 1–2 above), and selecting the appropriate action:

    >